Our WordPress themes come with three defined navigation areas, and each one of them can be customized using the Custom Menus functionality from WordPress:
- The Top menu
- The Main menu
- The Footer menu
You can customize each menu in Appearance > Menus.
You need to create individual menus by assigning them a name, and saving them. You can then add any menu elements you wish to by selecting them from the left column.
Once you have created your menus, you can assign them to the various menu areas specified by the theme. Most of our themes implement at least three menu areas: a top navigation bar, the main menu, and the footer menu. Only the main menu will show up even if there is no custom menu specified. The other two will not appear should there be no custom menu active.
A menu element may have as many children elements as you wish. Simply drag an element below its intended parent and indent it a bit to the right, forming a list-like structure. The main menu allows up to three depth levels, and two in older themes. Sub-menus will appear once you hover on each element that has children items.
Disabling Parent Menus
If you like to use drop-down menus, you may want to disable the parent menu element. In such cases, you can do so by creating a custom link as the parent, and placing a hash ‘#’ as the URL. That will make it so clicking on the menu element does nothing.
Using Icons in Menu Elements
You can also use the drop-down menu to add an icon. The icon will be shown alongside the menu link, and the resulting layout may vary from theme to theme. Be aware that this feature is only available in our most recent themes.
Highlighting Menu Elements
You can also designate a particular menu element as highlighted. This will give the item a colored background, corresponding to the primary or secondary color chosen in the Theme Options. Be aware that this feature is only available in our most recent themes.
Adding Menu Element Descriptions
Some premium themes come with the possibility of adding small descriptions under each menu element in the main navigation.
If you have specified a custom menu, you can add this subtext by filling out the Description field for each menu element. If the field does not appear, you’ll have to activate it first by using the Screen Options tab located at the top of the page, and then activation the Description option. That will make it appear on every item.
Creating Columns in the Footer Menu
Some themes also provide columned layouts for their footer menus, like Brilliance and Panoramica:
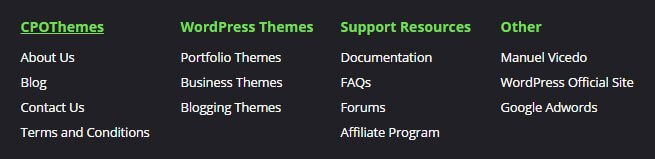
The footer menu is arranged so that when a custom menu is specified, all top-level items will appear as columns, and all children items will be placed in the column of their respective parent. Thus, if you want to add four columns with three rows each, you should create four top-level menu items and then add two sub-items to each one.